With the Newsletter app you keep in touch with guests between visits. Subscribers are collected in the shop and at checkout, and you write and send the newsletters straight from Awrora — without an external email tool.
The app works on every plan. Switch on Newsletter under SettingsApps. Newsletter then appears under Apps in the sidebar. Read more about apps.
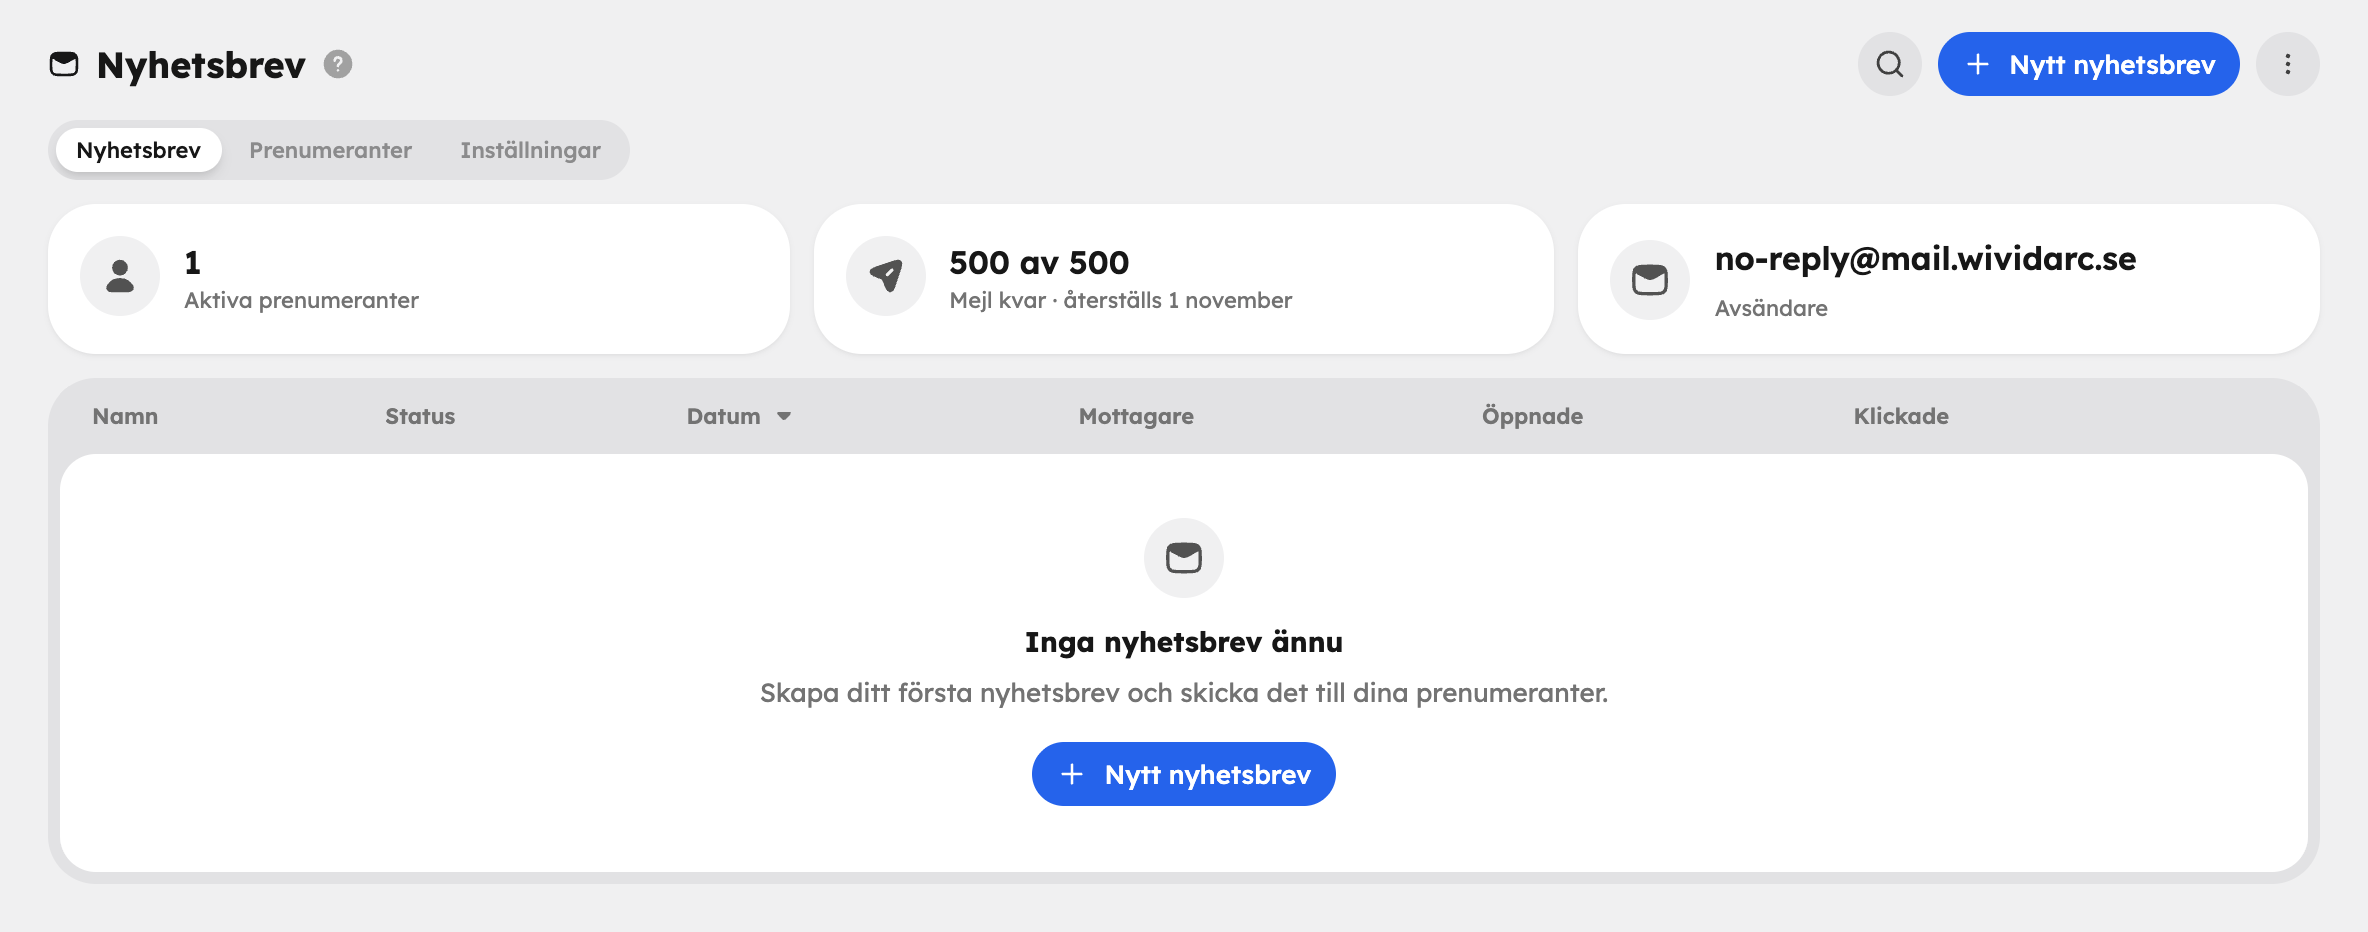
The app has three tabs: Newsletters (your newsletters), Subscribers and Settings. At the top of the first tab you'll see Active subscribers, how many emails you have left this month and which Sender the newsletters go out from.
How guests become subscribers#
When the app is on, guests can sign up in several places. Every box is unticked until the guest ticks it themselves.
- Checkout — a box below the email field when the guest books.
- The shop's newsletter section — add the Newsletter section in the web editor. It shows a field for the email address (and optionally the name) and a button.
- Forms — switch on Ask about the newsletter in a form.
- The customer account — guests with an account in the shop can switch the newsletter on or off in their profile themselves.
Each subscriber automatically gets tags based on where they signed up, for example source:booking or source:form, and often also which experience or form it was. You can then choose recipients by those tags.
Subscribers#
Under the Subscribers tab you'll see Email, Status, Tags, Source and when the person signed up. Filter by status or search for an address.
- New subscriber — add a person by hand. Tick that the person has asked to receive the newsletter themselves.
- Import — upload a CSV file with an email column and ideally name and tags. You can put a tag of your own on everyone imported, so it's easy to send to just that list. Addresses that have unsubscribed or bounced are never added again.
- Export — download the whole list as a CSV file.
In the menu on a row you can Unsubscribe a subscriber, who then gets no more newsletters, or Delete the address from the list completely.
Only import and add people who have asked to receive your newsletters themselves. It's both a legal requirement and what keeps your sends out of the spam folder.
Write a newsletter#
New newsletter
Click New newsletter under the Newsletters tab. Give the newsletter a name and choose what to Start from: Blank newsletter, News, Offer or a template you've saved before. Click Create newsletter.
Mailing
Fill in the Subject line and ideally the Preview text, the short text shown after the subject line in the inbox. The Name is only shown in the admin.
Recipients
Choose All active subscribers or Subscribers with specific tags. With tags, you choose whether the recipient should have Any of the tags or All of the tags. Below the field you'll see how many people the newsletter goes to.
Content
Build the newsletter from blocks: Logo, Heading, Text, Image, Button, Divider, Spacer, Social media and Columns. Drag the blocks to change the order.
Save
Click Save in the bar that appears when you have unsaved changes.
Personalise the subject line and text with {firstName}, {fullName} and {siteName}. The unsubscribe link and the company's address are added at the bottom of every newsletter automatically.
In the Actions menu you can Preview the newsletter as on desktop and mobile, Save as template, Duplicate or Delete it.
Ask Aurora to write a draft, for example "make a newsletter about this autumn's paddling tours for everyone who has booked kayaking". She can also send the newsletter, but always asks you first.
Send#
Send a test
Click Send test and enter up to three addresses. The test email is marked with [Test] in the subject line and doesn't count towards this month's quota.
Send or schedule
Click Send… and choose Send now, which goes out within a few minutes, or Schedule and pick a date and time. You'll see the recipients and how many emails you have left this month.
A send can't be recalled once it has gone out. You can change a scheduled newsletter by clicking Cancel schedule — it then becomes a draft again. While a send is in progress you can Stop sending, and anyone who hasn't received the newsletter yet won't get it.
Admins send, schedule and stop newsletters. Editors can write newsletters, manage subscribers and send test emails.
This month's quota#
How many emails you can send per calendar month depends on your plan. The quota resets on the 1st of every month, and a single send can never be larger than what the plan gives you in a month. If a send doesn't fit, it's stopped before it starts — narrow the selection, wait until next month or change plan under Plans and billing.
Statistics#
Once the newsletter has gone out, it shows how many people it was sent to, Delivered, Opened, Clicked and Unsubscribed, plus Bounces and errors and the Most clicked links.
Opens are counted when the recipient's email client loads the newsletter's images. Some clients, such as Apple Mail, do this automatically, so the open rate is only an indication. Clicks are more reliable.
If a send gets too many bounces or spam complaints, newsletters are paused. Contact Awrora support to resume them. You can still edit newsletters and send test emails.
Sender#
Under the Settings tab you choose which address the newsletters are sent from. You need to be an admin to do this.
| Sender | How it works |
|---|---|
| Awrora's newsletter address | Default. Newsletters go out from an address with your company's short name on Awrora's newsletter domain, for example kajakbolaget@nyhetsbrev.awrora.app. Works straight away, with no DNS settings. |
| Your own email domain | Newsletters go out from your own verified domain. Requires a verified email domain — contact Awrora support to connect one. |
Under Sender you fill in the Display name, the name recipients see in their inbox, and the Reply-to address, where replies go. If you leave the fields empty, the organisation's name and email address are used. Click Save when you're done.
Unsubscribing#
Every newsletter has an unsubscribe link. The recipient confirms with one click and gets no more newsletters. The subscriber stays in the list with the status Unsubscribed, and the address is never added again by an import.
If you switch off the app#
If you uninstall Newsletter, the box at checkout, the newsletter box in forms, the choice in the customer account and the shop's newsletter section all disappear. Subscribers and newsletters are kept, so if you install the app again, everything is still there.