Here we go through everything that describes the experience: text, images, facts for the guest, and how to publish, restore or delete it. Prices and dates have their own pages.
Create an experience#
Open Experiences
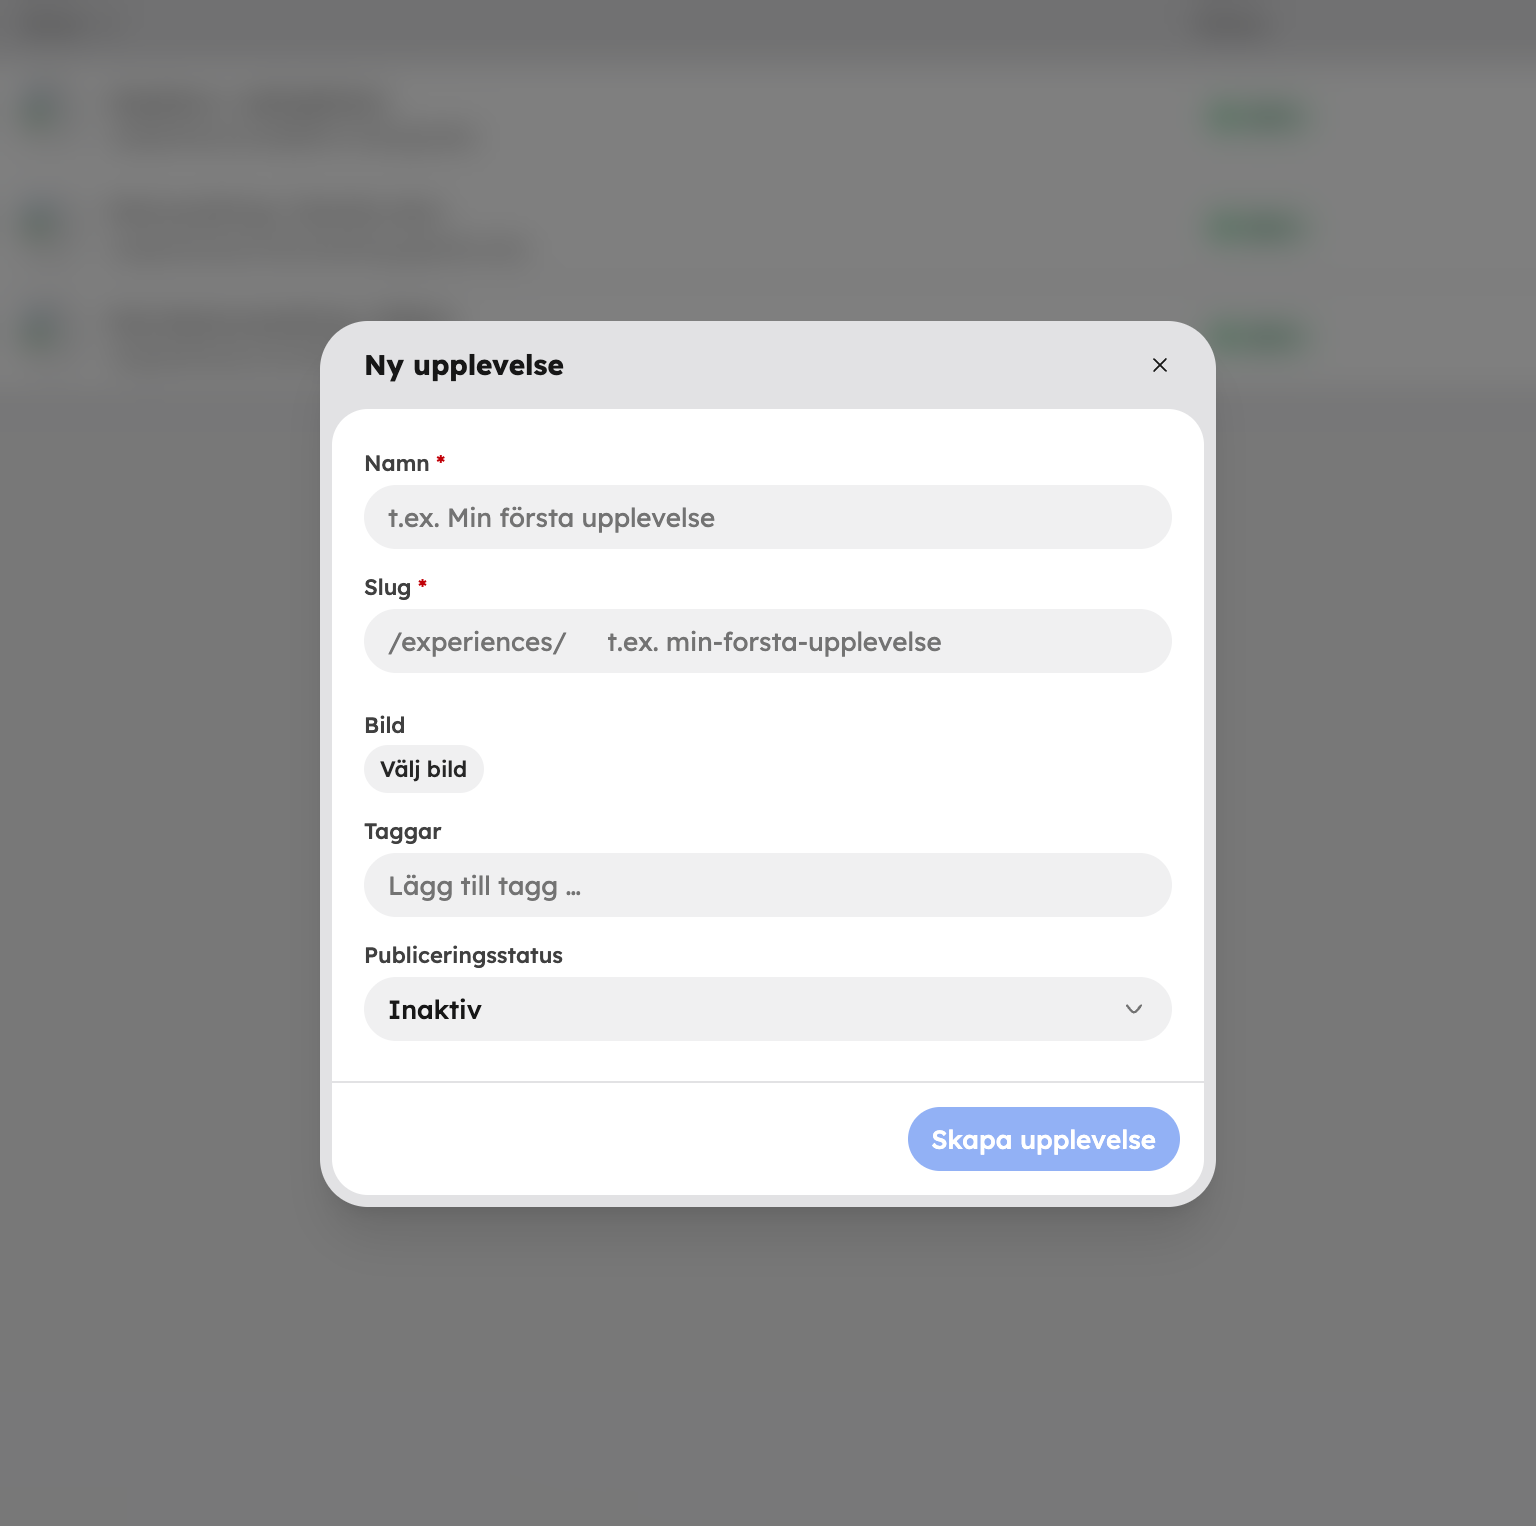
Go to Experiences and click New experience.
Give it a name
Type the Name. The Slug — the address of the experience page — is suggested based on the name. It can only contain lower-case letters, numbers and hyphens, and must be unique for your site. You can also choose an image and tags straight away.
Create and fill in
Leave Publication status set to Inactive and click Create experience. The editor opens and you can carry on with content, prices and dates.
Then you can import them instead. Click Import in the experience list — the button is there as long as the list is empty. You can fetch experiences directly from Understory, Bookspot or Bokun, or upload a CSV file from, for example, FareHarbor, TrekkSoft or Regiondo. Imported experiences are always inactive until you publish them.
Content and media#
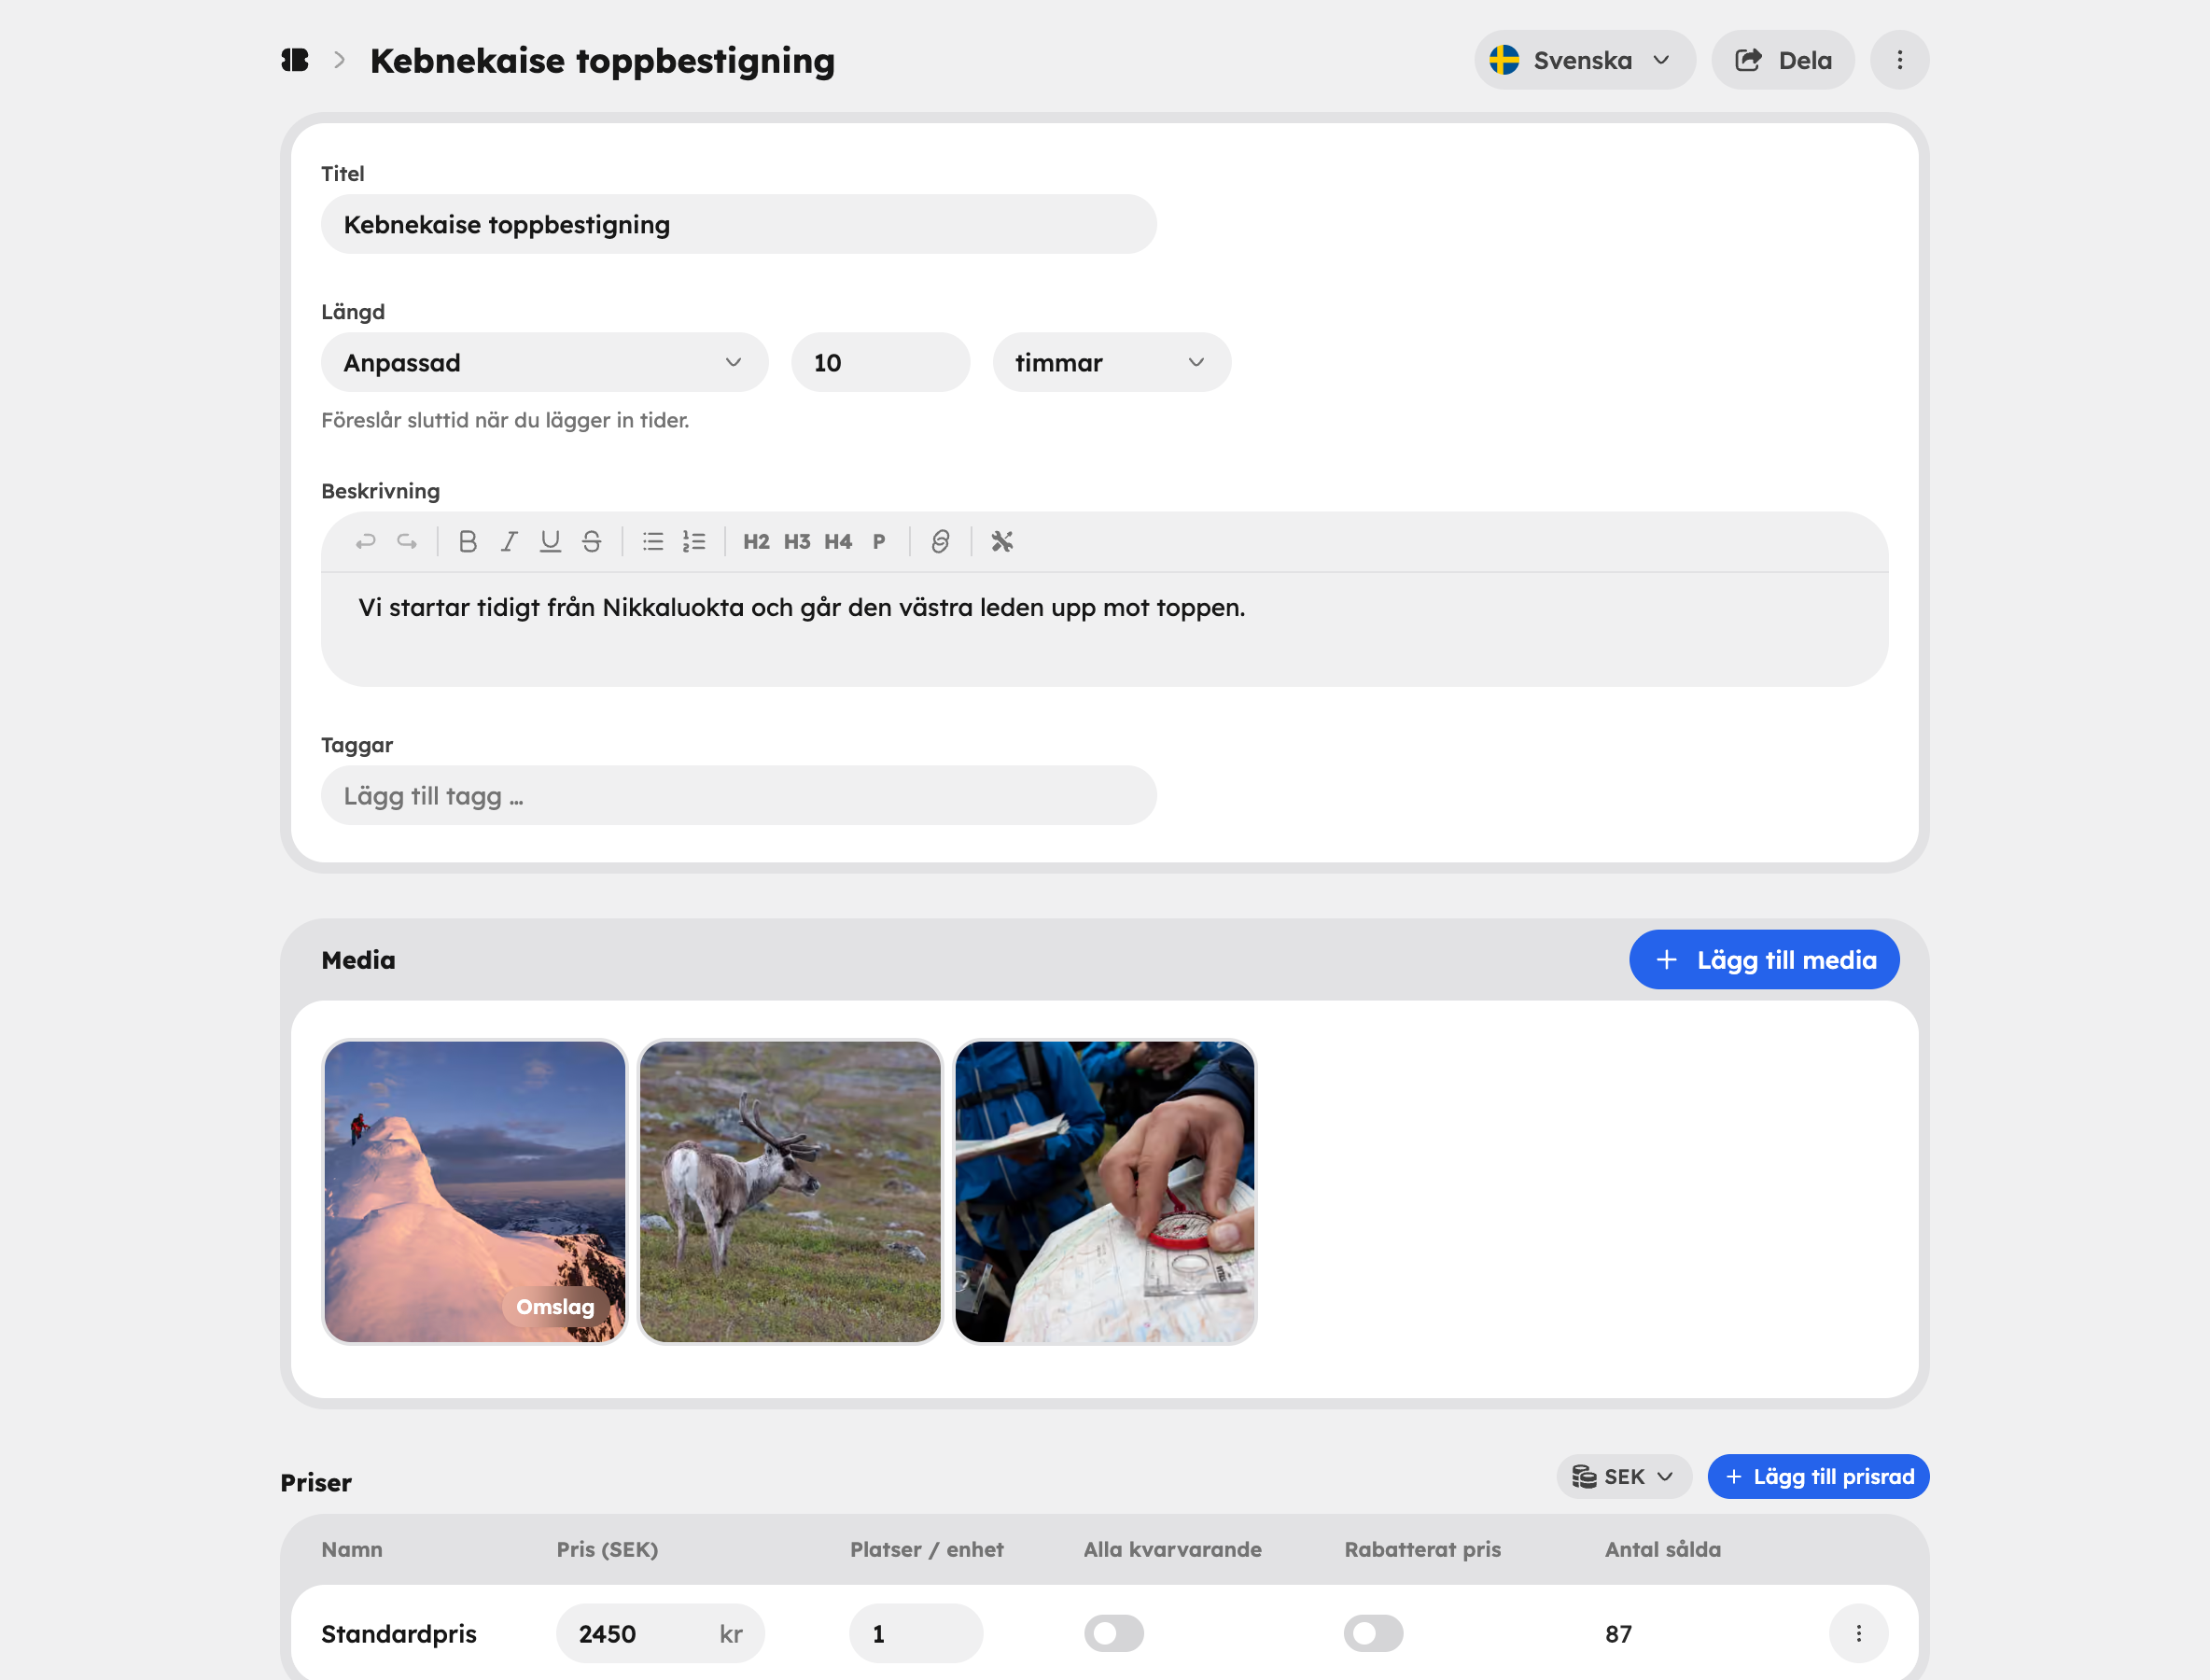
At the top of the editor you fill in Title, Duration, Description and Tags. Tags let guests filter the experiences in your shop, and you get suggestions from tags you already have. The duration suggests the end time when you add dates.
Under Media, click Add media to choose images and videos from the media library, or drop files straight into the box. The first image becomes the main image. Images can be JPG, PNG, GIF, WebP or SVG and videos MP4 or WebM, up to 10 MB per file.
You save your changes with Save in the bar that appears at the bottom. If you can't save, the title or a price in the default currency is usually missing.
Settings#
At the bottom is the Settings table. Click a row to open it:
| Row | What you set |
|---|---|
| Included and not included | What the price covers and what the guest pays for themselves. |
| Questions and answers | Frequently asked questions shown on the public experience page. |
| Quick facts and location | Short facts such as difficulty and starting point, plus the meeting point on a map. |
| Checkout | Extra fields the guest fills in when booking, for example allergies. |
| Booking rules | Exceptions to the company's defaults. See Time slots. |
| Publishing and SEO | Whether the experience is publicly visible, and how it's described in search engines. |
Quick facts and meeting point#
Quick facts are free-form rows with a Label and a Value, for example "Difficulty: Easy". Switch on Show meeting point on map and enter the Latitude and Longitude to show an embedded map on the experience page.
Checkout fields#
Under Checkout you add your own fields of the type Text field, Text area, Dropdown or Checkbox. Each field has a Label and an optional placeholder, and can be made a Required field. For a dropdown, you write the options one per line or separated by commas.
Publish#
Under Publishing and SEO, change Publication status to Active and save. The row in the table then shows Published. An inactive experience isn't shown in the shop and can't be booked. This is also where you fill in SEO title and SEO description.
A quicker way is Actions at the top right of the editor: Activate publishes the experience and Archive makes it inactive again. Both are saved straight away.
The Share button copies the link to the experience page in your shop, so you can easily pass it on. The link works once the experience is active.
Translations#
If you have several languages, choose the language in the language picker at the top of the editor. In translation mode you only edit the text: title, description, duration, included and not included, questions and answers, quick facts, price row names, checkout fields, SEO and the slug. You change prices, dates and settings in the default language. Read more under Languages and currencies.
Versions, duplicating and the bin#
- Version history — under Actions you can see every saved version, when it was saved and by whom. Choose a version and click Restore version. The content and settings are replaced, but the dates aren't affected.
- Duplicate — in the list, from the menu on the row. The copy is inactive and has no dates. Handy when you're making a similar tour.
- Delete — the experience goes to the bin, and you can undo straight away in the message that appears. Choose Bin in the status filter to see how much of the 30 days is left, and to Restore or Delete permanently.