With the form builder you create your own forms — for example a contact form, an expression of interest or an enquiry about a group booking. You build the form in the admin and then place it on any page in the shop.
Go to ShopForms.
Create a form#
New form
Click New form and give it a name, for example "Contact".
Add fields
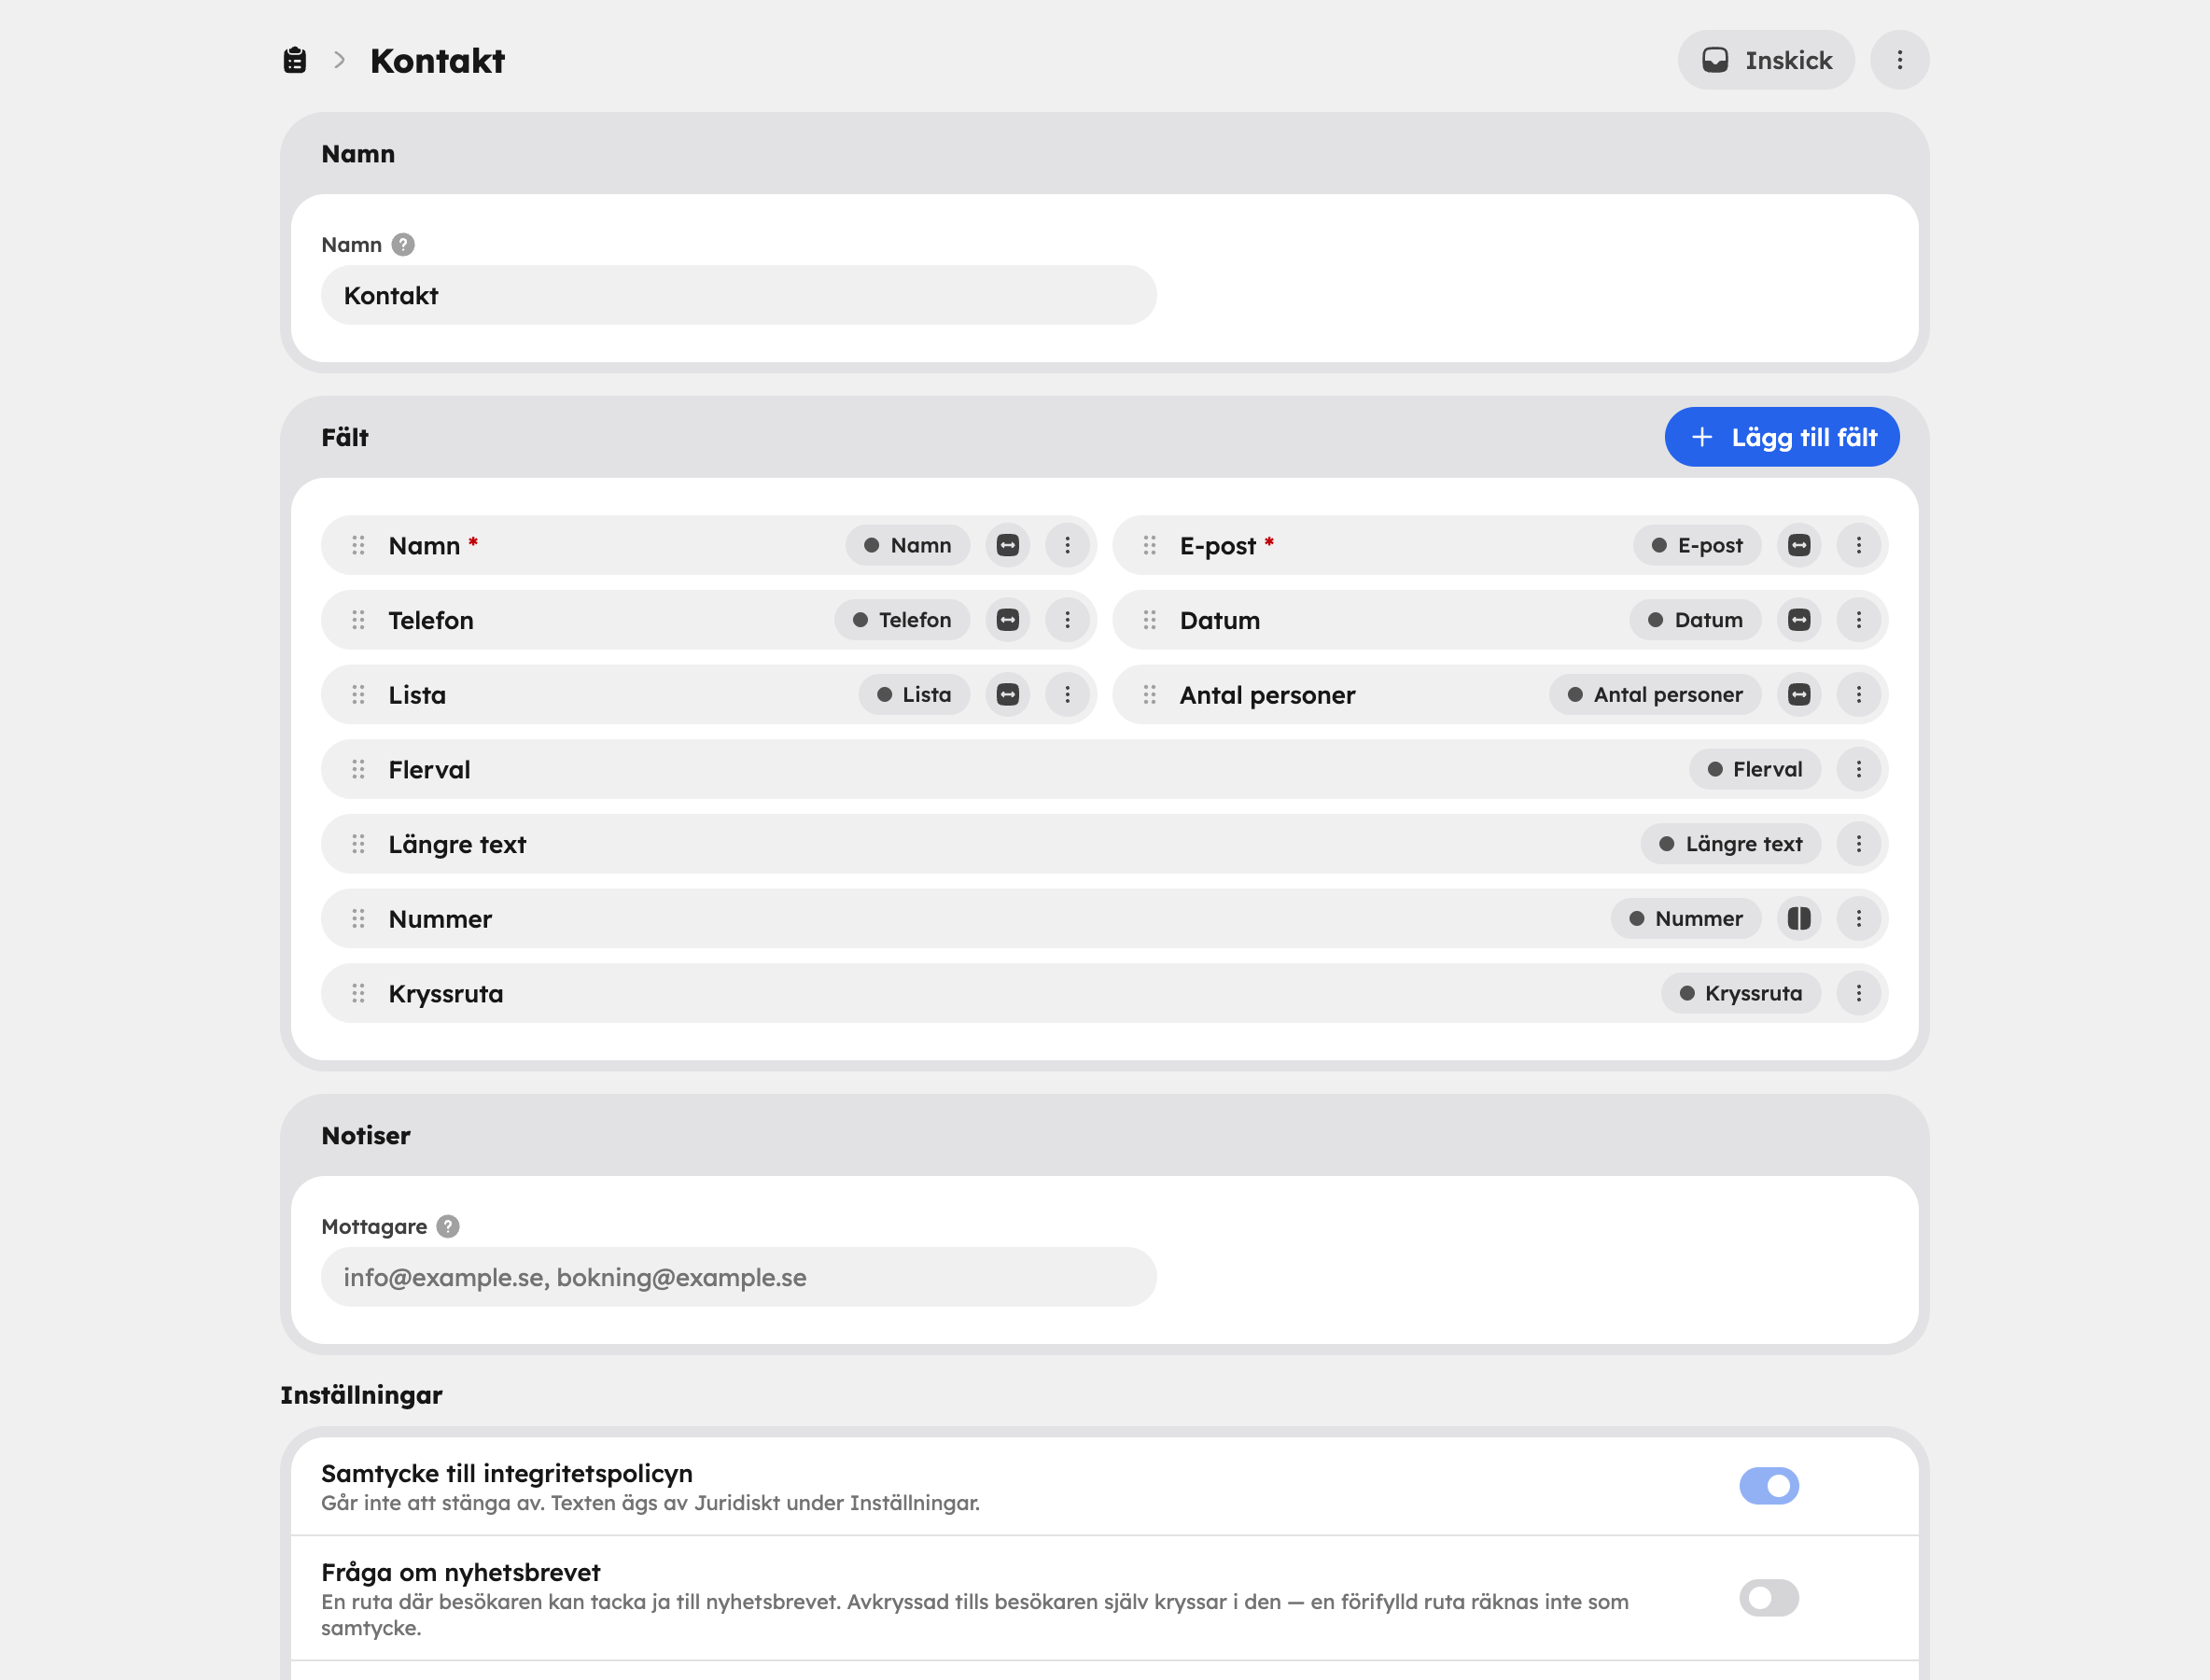
Click Add and choose a field type. Drag the fields into the order you want.
Set up each field
Enter a Label, Placeholder and Help text, and tick whether the field is Required. With Make half width, two fields can sit side by side.
Choose recipients
Under Notifications, enter in Recipients which email addresses should receive an email for each submission, comma-separated and up to 20 of them. If you leave the field empty, the email goes to the site's usual notification recipients.
Save
Click Save.
Field types#
| Group | Field types |
|---|---|
| Contact details | Name, Email, Phone |
| Other fields | Text, Long text, Date, Number of people, List, Multiple choice, Number, Checkbox |
The fields under Contact details link the submission to a customer in your customer list. A form can have up to 50 fields. Long text, Checkbox and Multiple choice always take up the full width.
The field type is locked once the field has been created. If you want to change the type, add a new field and remove the old one.
Settings#
- Ask about the newsletter: adds a box where the visitor can opt in to your newsletter. The box is always unticked until the visitor ticks it themselves. It requires the Newsletter app.
- Confirmation to the sender: sends an email with a copy of the answers to the person who filled in the form. Requires an Email field in the form and a verified email domain for the site. The email's subject and text are the same for all forms and are set under SettingsNotifications — see Email and notifications.
- Consent to the privacy policy: always switched on. You edit the text under SettingsLegal.
- After submission: the button text, thank-you heading and thank-you text the visitor sees once the form has been sent.
Add the form to the shop#
Open the web editor, go to the page where the form should appear and add the Form section. Then choose which form the section should show.
Read the submissions#
Open the form and go to Submissions. There you'll see all responses with their dates, and you can search and open each submission to see the details.
All public forms in the shop are protected against spam and bots.
Archive and delete#
- Archive: the form no longer appears in the shop and doesn't accept submissions, but stays under Archived in the forms list. You can Unarchive it whenever you like.
- Delete: the form is moved to the Bin and stays there for 30 days before it's permanently deleted. During that time you can get it back with Restore.