Your shop always has a working Awrora address. When you connect your own domain, for example dittforetag.se, visitors to the Awrora address are sent on to your primary domain. On this page we cover domains, redirects and search engine settings.
Connect your own domain#
Go to ShopDomain.
Add the domain
Under Custom domains, click Add domain, enter the domain and confirm with Add domain.
Verify that the domain is yours
Add the TXT record shown with the company you bought the domain from and click Verify. Until then the domain has the status Awaiting verification, and it only shows your shop once it's verified.
Change DNS with your provider
Add the DNS records shown for the domain. Under How do I change DNS with my provider? there's help for common providers. It can take up to 24–48 hours for the change to take effect.
Check the connection
Once DNS has taken effect, the domain is shown as Connected. Until then it shows as Not connected. Choose Refresh in the domain's menu to check again.
Choose a primary domain
If you have several domains, choose Make primary on the one that should be the main address. The other domains forward to it.
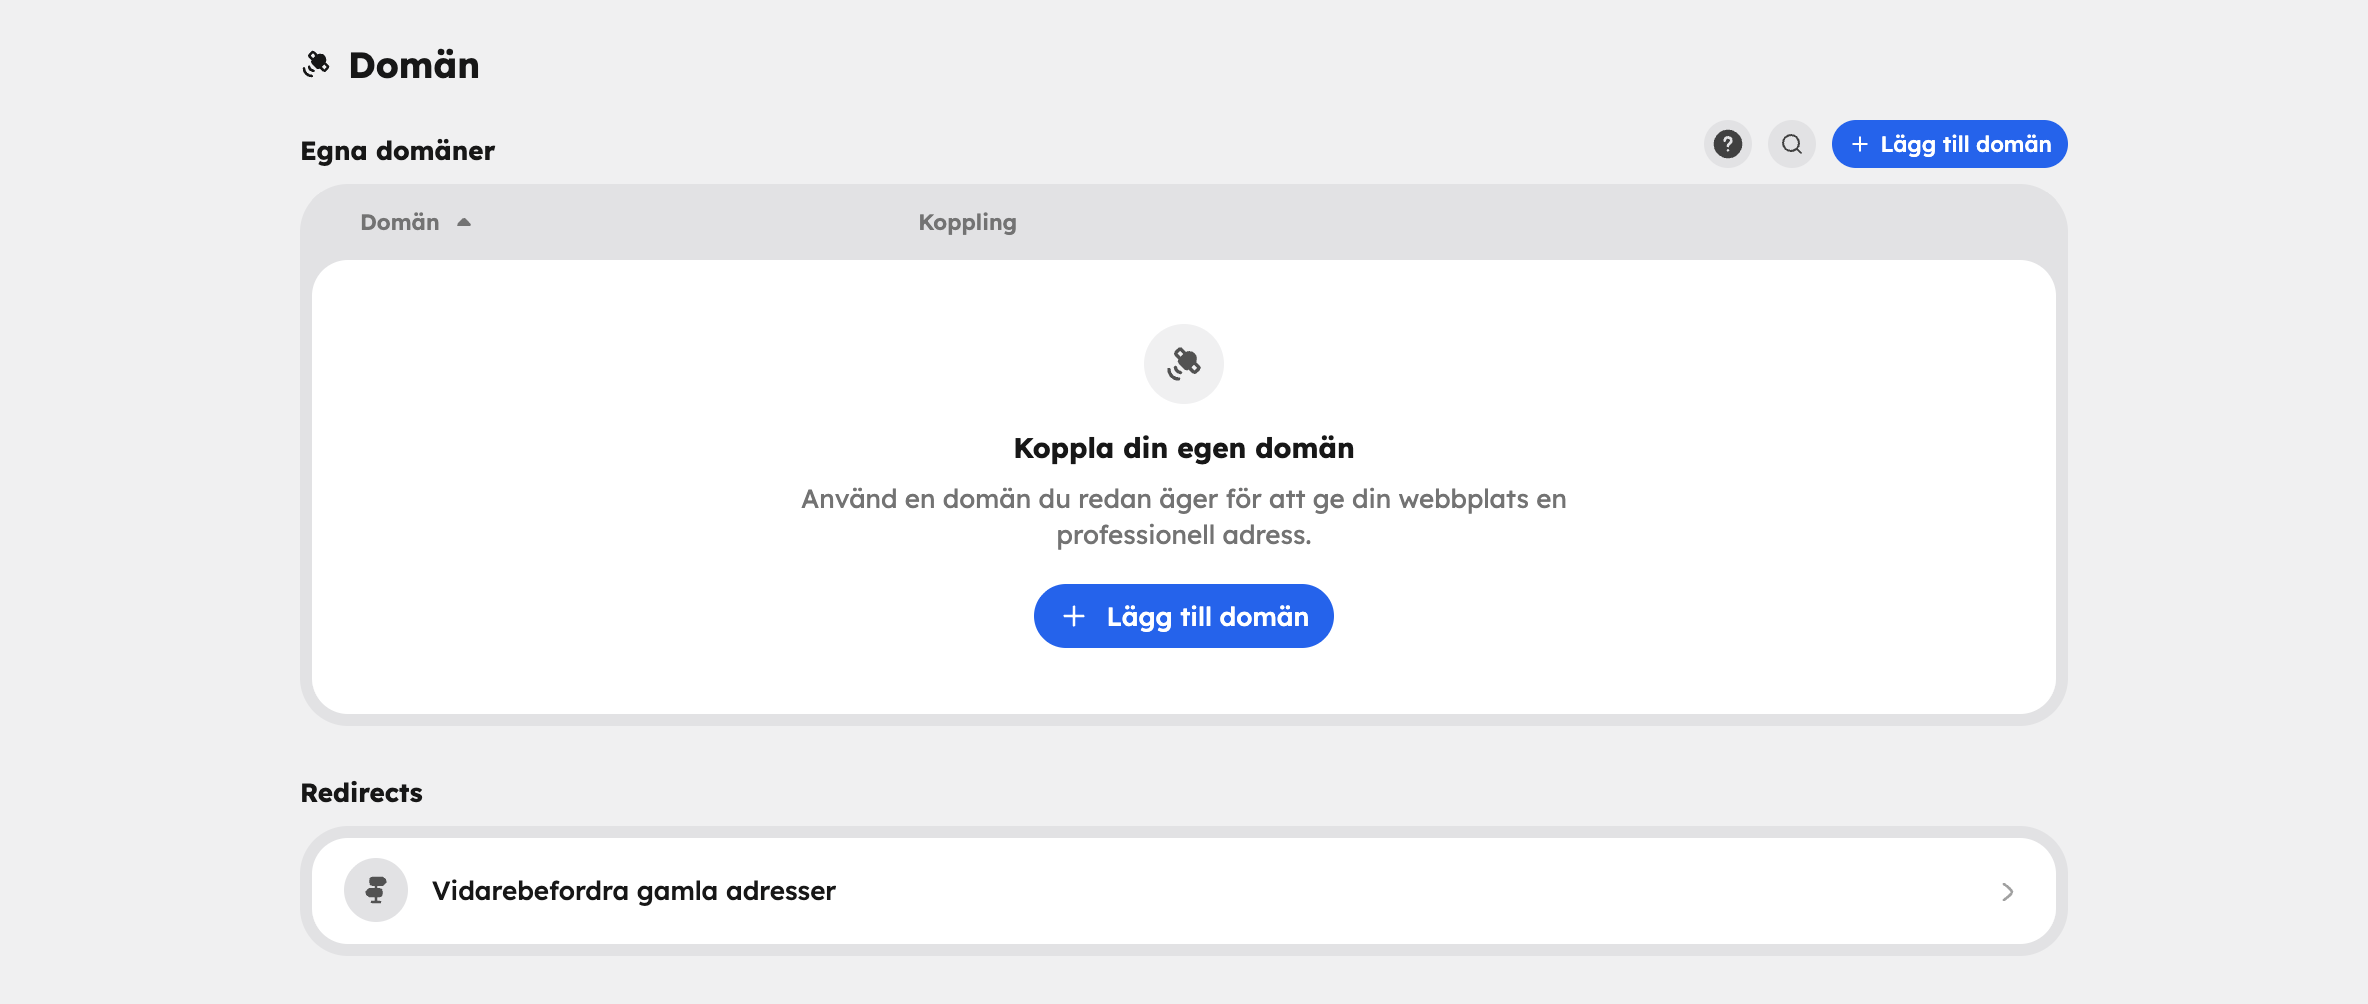
Only administrators can connect domains and change the address.
If you have several languages, each language can have its own domain. You set this up under Languages and currencies.
Redirects from your old website#
If you're moving from another website, you'll want old links and Google results to keep working. Click Forward old addresses on the domain page. Under Redirects, click Add redirect and enter:
- From (path on your old website), for example
/about-us. - To (path in the shop or https address), for example
/pages/about-us. - Status code: 301 · permanent when the page has moved for good (carries over your Google ranking) or 302 · temporary.
The home page and the shop's own paths can't be redirected. The list shows how many hits each redirect has had.
If you change the address (slug) of a page, blog post or experience in Awrora, the redirect is created automatically.
If you're moving from an existing website, Aurora can help. Choose Move site under Get help on the shop overview, and she'll fetch text, images and colours and can add redirects for the old addresses.
SEO settings#
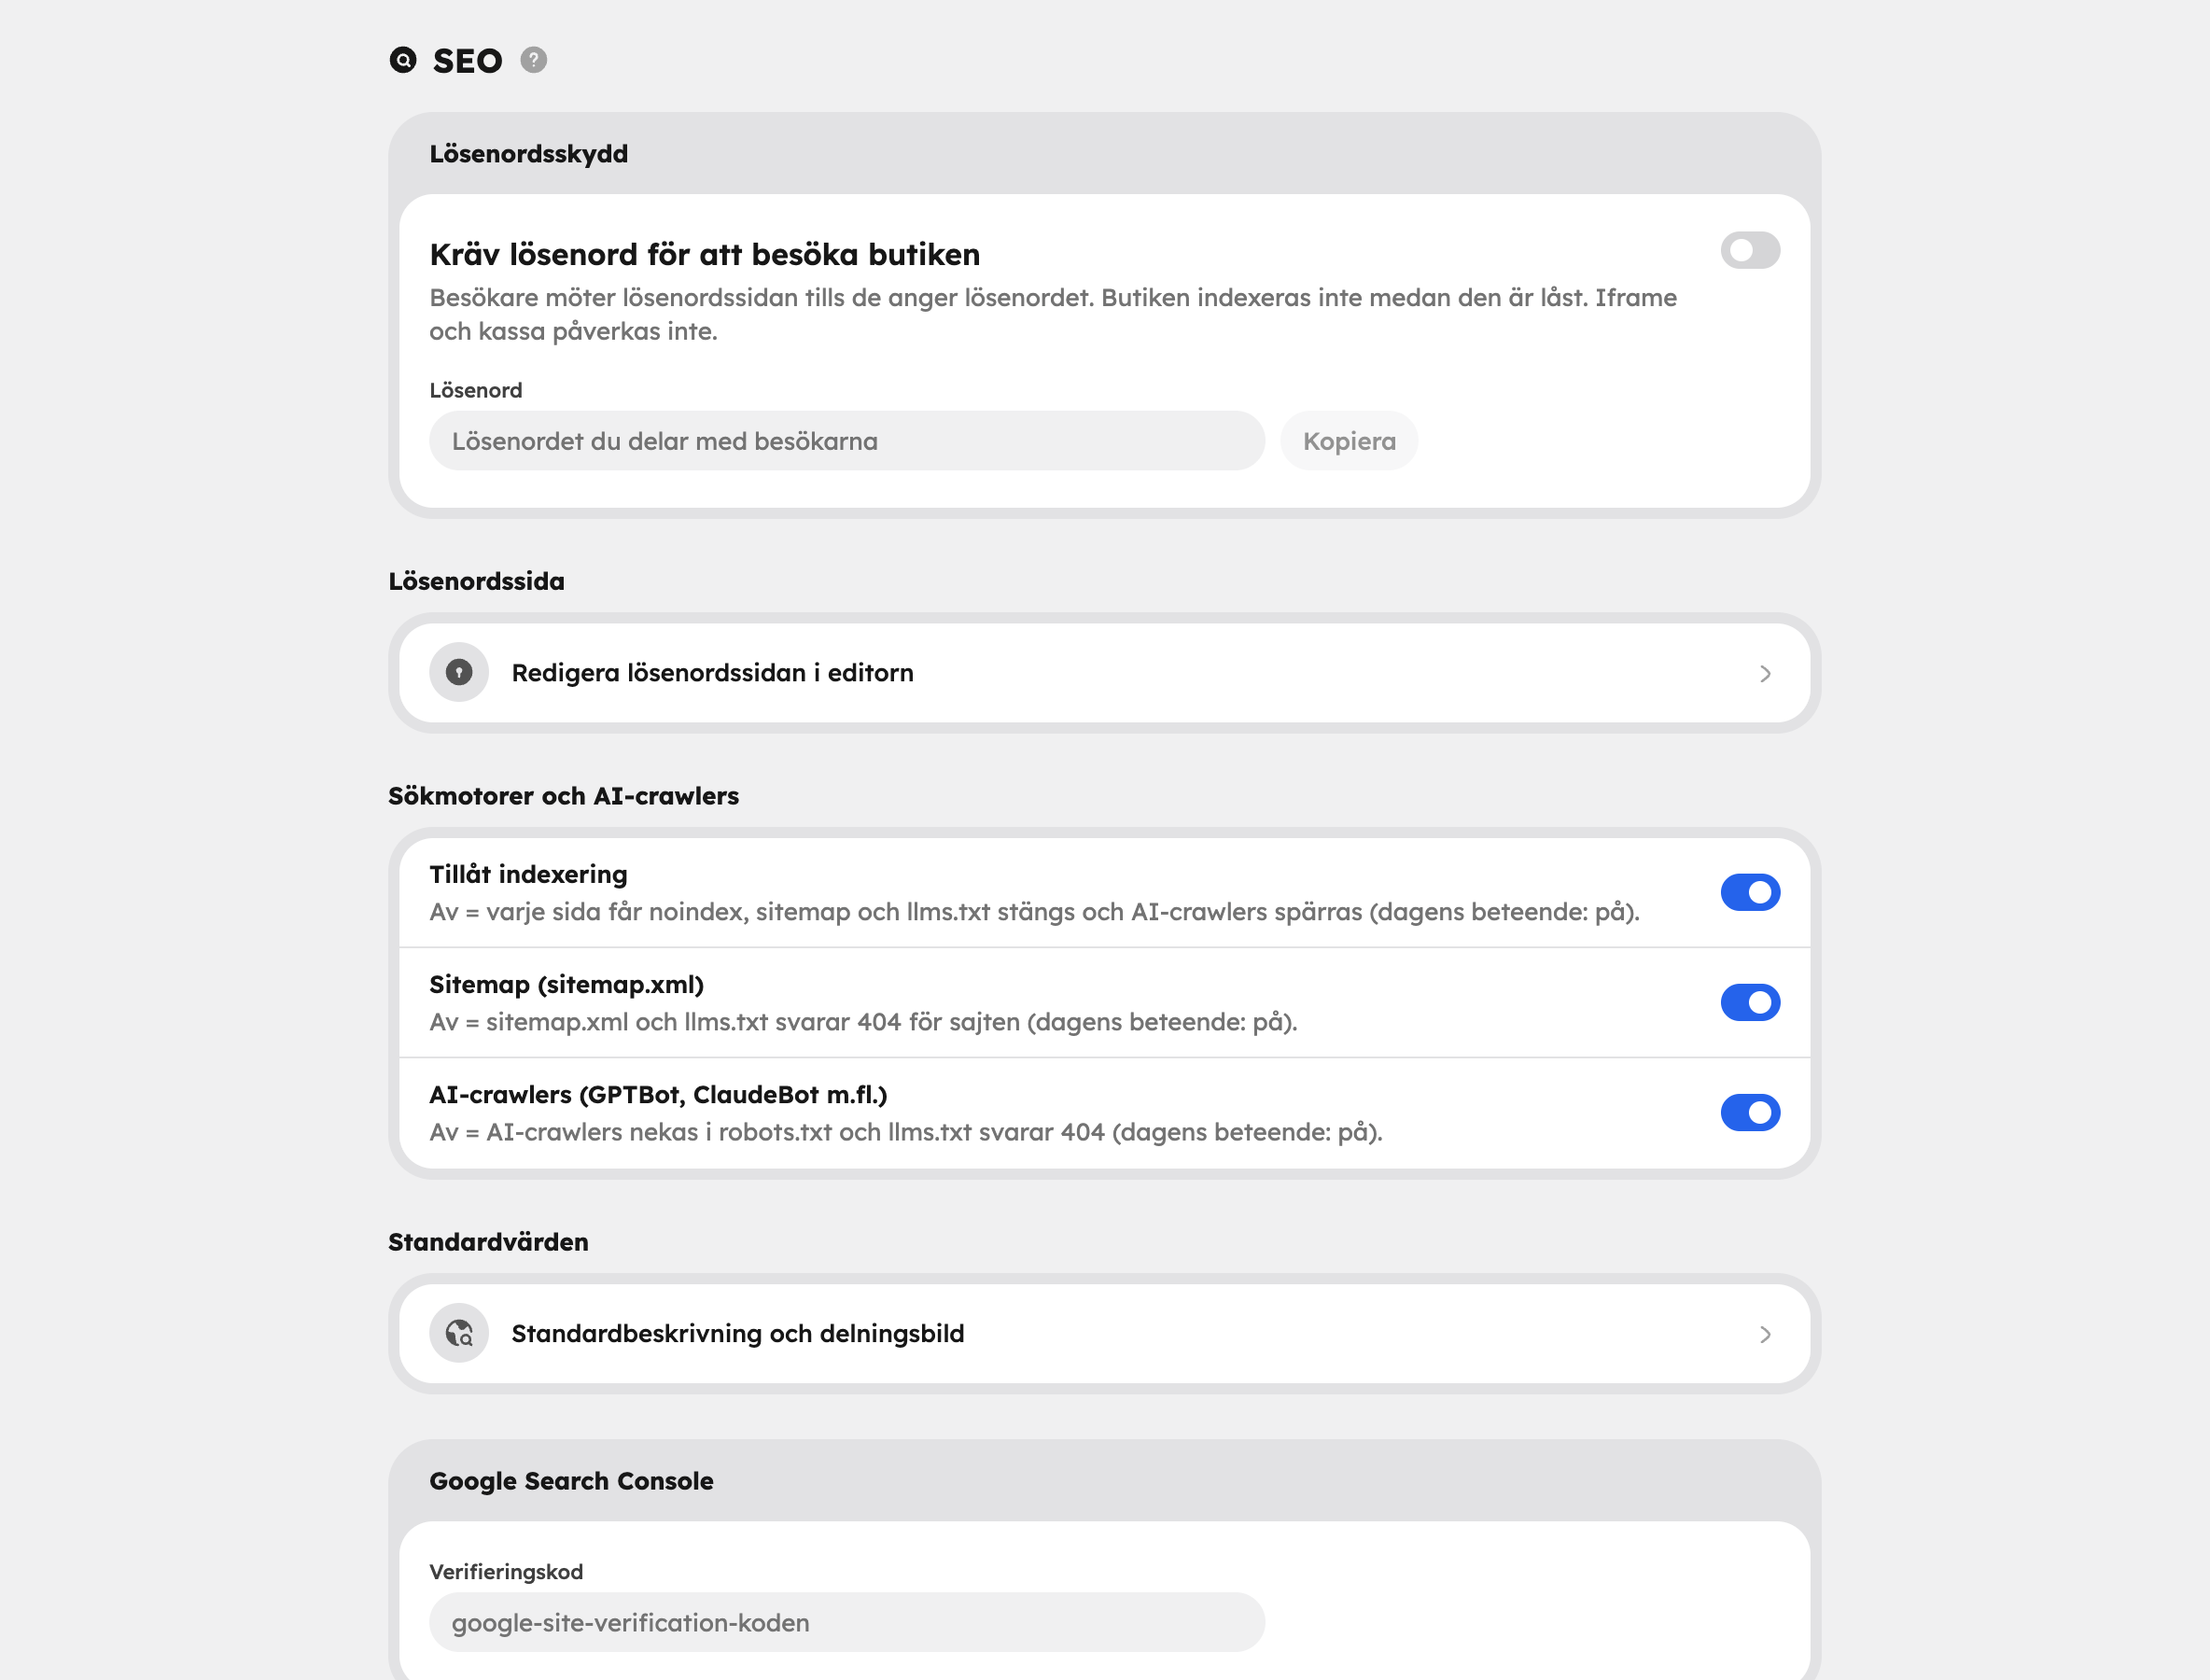
Go to ShopSEO. Your changes are saved when you click Save.
Password protection#
With Require a password to visit the shop, visitors see a password page until they enter the password you've chosen. This is handy while you finish building the shop. The toggle is off by default. While the shop is locked it isn't indexed, but the embed and checkout work as usual. You change how the password page looks with Edit the password page in the editor.
Search engines and AI crawlers#
Three toggles control how the shop is seen from the outside. They are all switched on from the start.
- Allow indexing: lets search engines such as Google index the shop.
- Sitemap (sitemap.xml): publishes a map of the shop's pages — experiences, pages, blog and staff — and an
llms.txtfor AI services. - AI crawlers (GPTBot, ClaudeBot etc.): lets AI services read the shop, so they can recommend your experiences.
If you switch off Allow indexing, every page gets noindex, the sitemap and llms.txt are closed and AI crawlers are blocked. The shop will then gradually disappear from Google. Only do this if the shop shouldn't appear in search.
Defaults#
Under Defaults, open Default description and share image:
- Default description: shown in search results and when a link is shared, on pages that have no description of their own. It can be translated per language.
- Share image: the image shown when someone shares a link to the shop and the page has no image of its own. You choose it from the media library.
You set a custom title, description and share image for an individual page under Page settings in the web editor.
Google Search Console#
Paste the code, or the whole meta tag, from Google Search Console into Verification code. This proves to Google that the shop is yours.